Getting Started with Dolphin Cloud
Dolphin Cloud is a platform for automating and scaling advertising campaigns. When used together with ZM apps, Dolphin Cloud lets you quickly launch and optimize traffic.
This article describes the basic process of preparing accounts and launching campaigns.
1. Connecting Facebook Ad Accounts
Filling in Account Details
- Open the Dolphin Cloud interface.
- Go to ADS Manager → Accounts → Add account.

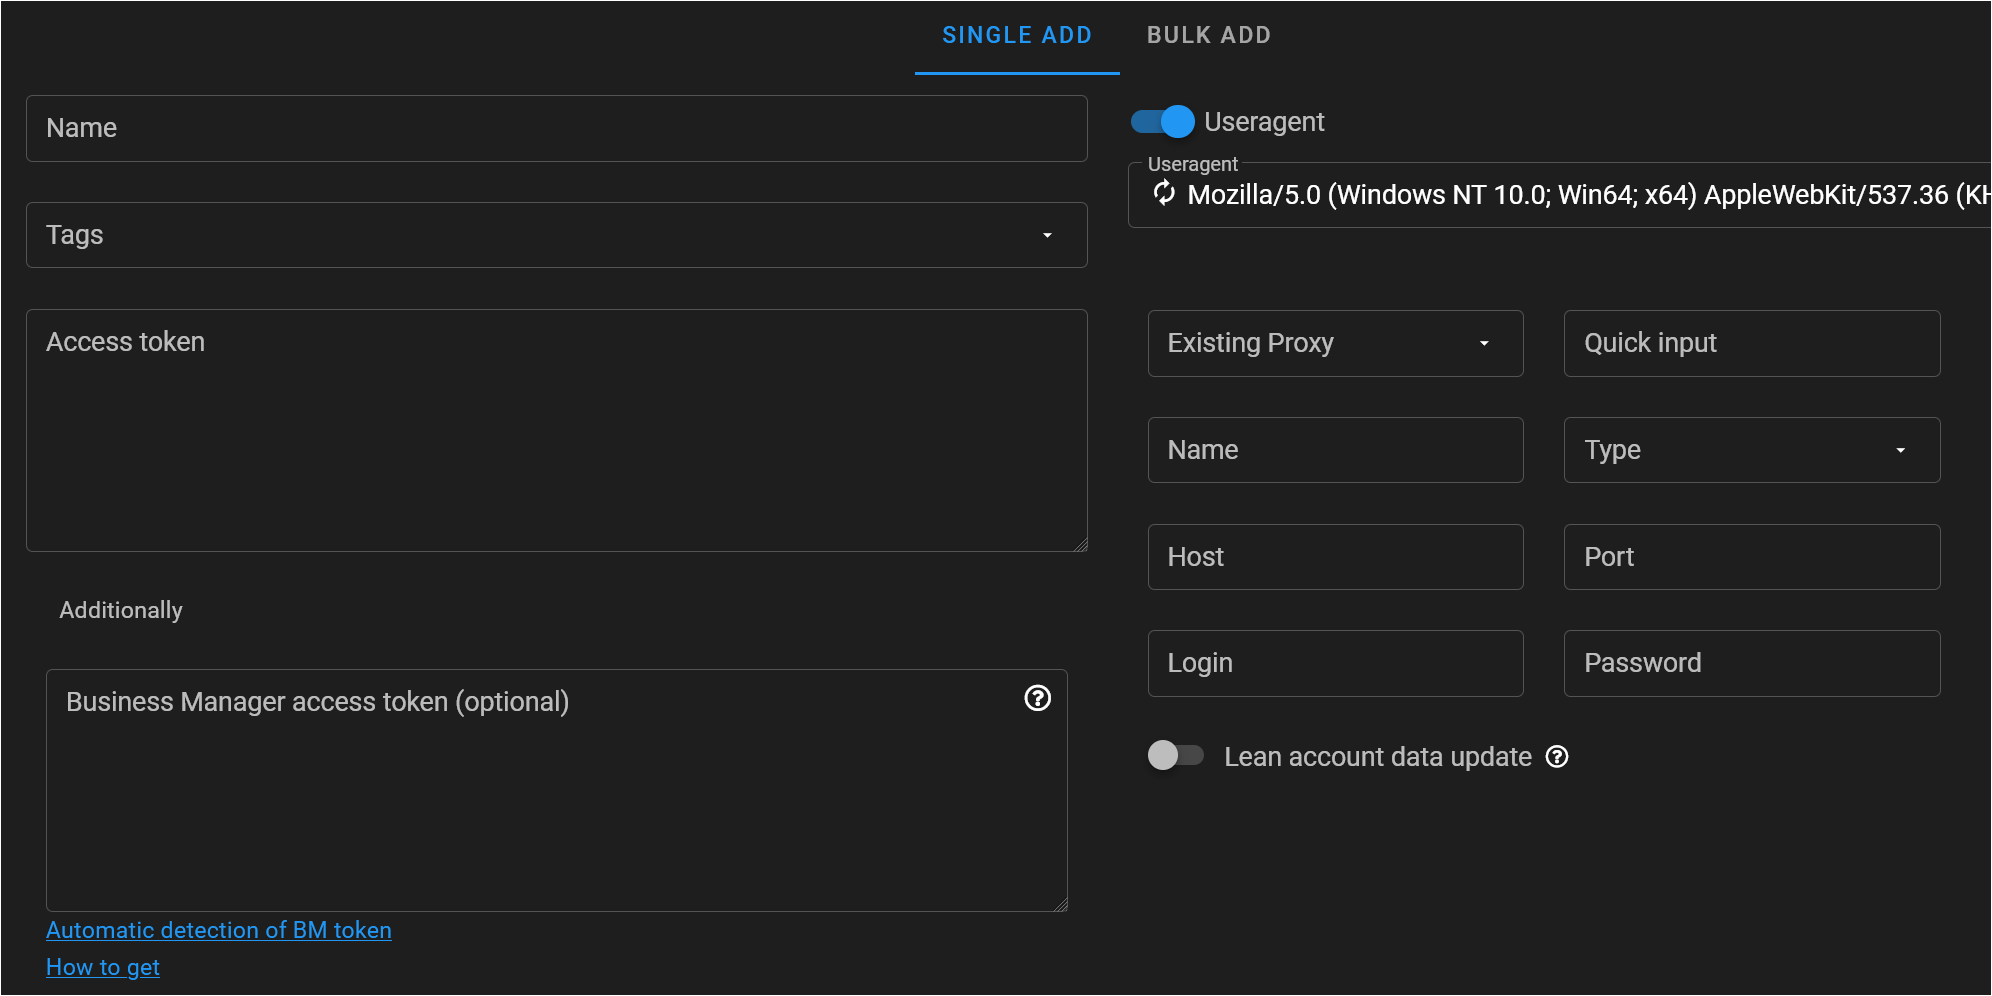
- In the window that opens, fill in the following fields:
- Name — any account name for easier navigation.
- Account token — the Facebook ad account access token.
- Proxy — any supported proxy.
- Cookies — cookies from the Facebook social account.
- Business Manager token — optional.
Getting the Business Manager Token
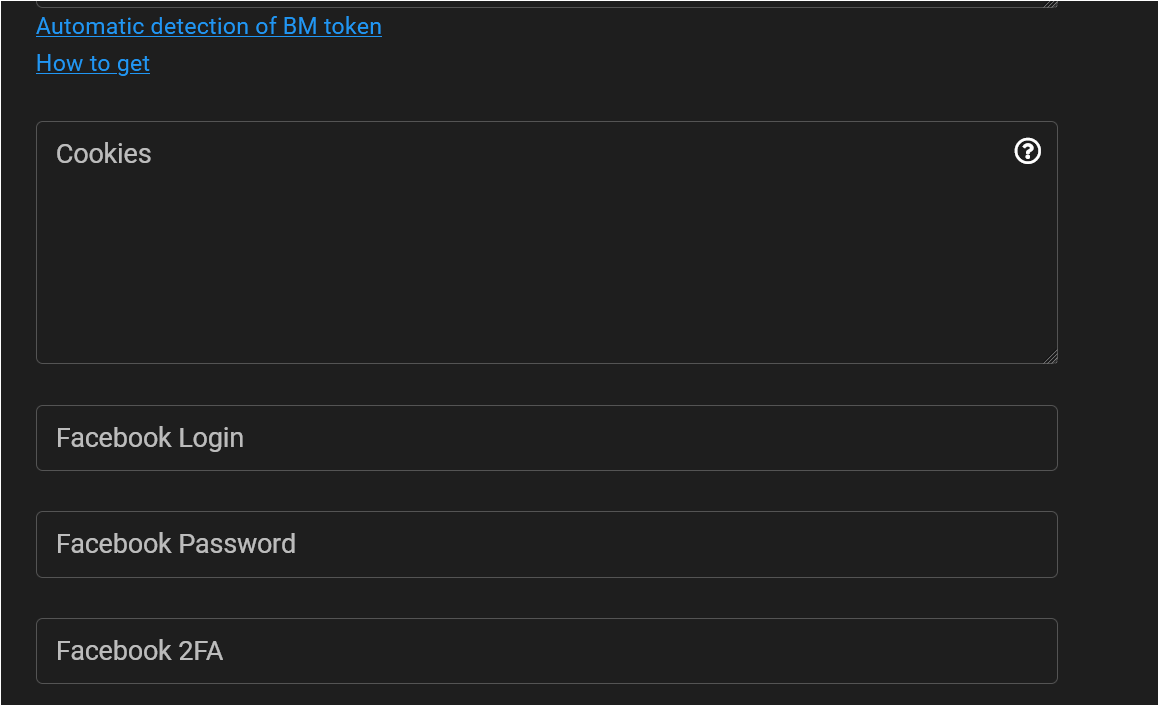
The Business Manager token can be detected automatically or added manually.
Automatic detection
- Upload the Facebook social account cookies in the account settings in Dolphin Cloud.
- Click Automatic detection of BM token.
If the request returns an error, possible reasons are:
- the account does not have an active Business Manager;
- the cookies are invalid or expired.
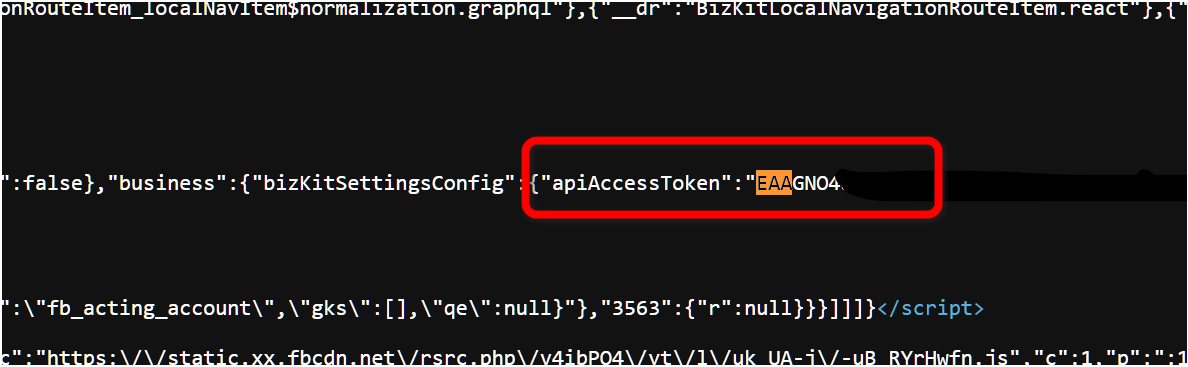
Manual token retrieval
- Go to Facebook Business Manager.
- Open the page source:
- Windows —
Ctrl + U - macOS —
Cmd + U
- Windows —
- Use page search (
Ctrl + F/Cmd + F). - Find a line with the keywords:
apiAccessToken- or
EAA
- Copy the token that starts with
EAAG....
Checking account status
If after adding the account its status stays ERROR, do the following:
- Select the account with a checkbox.
- Click Three dots → Refresh token.
- Wait until the status changes to NEW.
- Click Check token.
After that, the account status should change to ACTIVE.
Accepting Meta Mandatory Requirements
After adding accounts, you need to accept Facebook’s non-discrimination policy.
To do this:
- Select the required accounts with checkboxes.
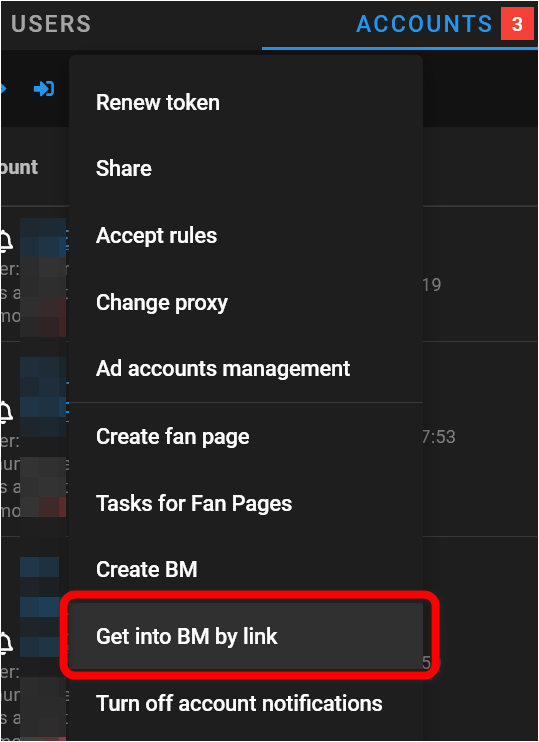
- Click Three dots in the top menu.
- Choose Accept rules.
- Wait for the process to finish.
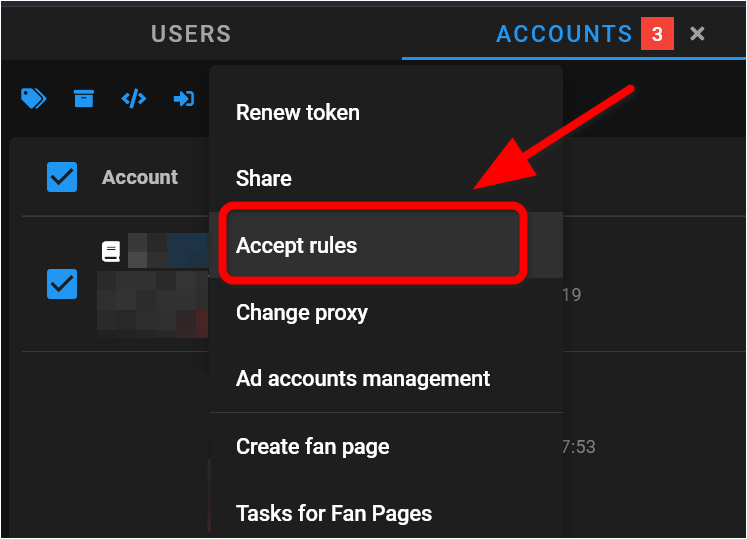
Even if you already accepted the rules earlier in a browser, it is recommended to do this again via Dolphin Cloud.
Creating a Fan Page
If the ad accounts are new, they usually do not have a Fan Page.
To create a Fan Page:
- Select the accounts with checkboxes.
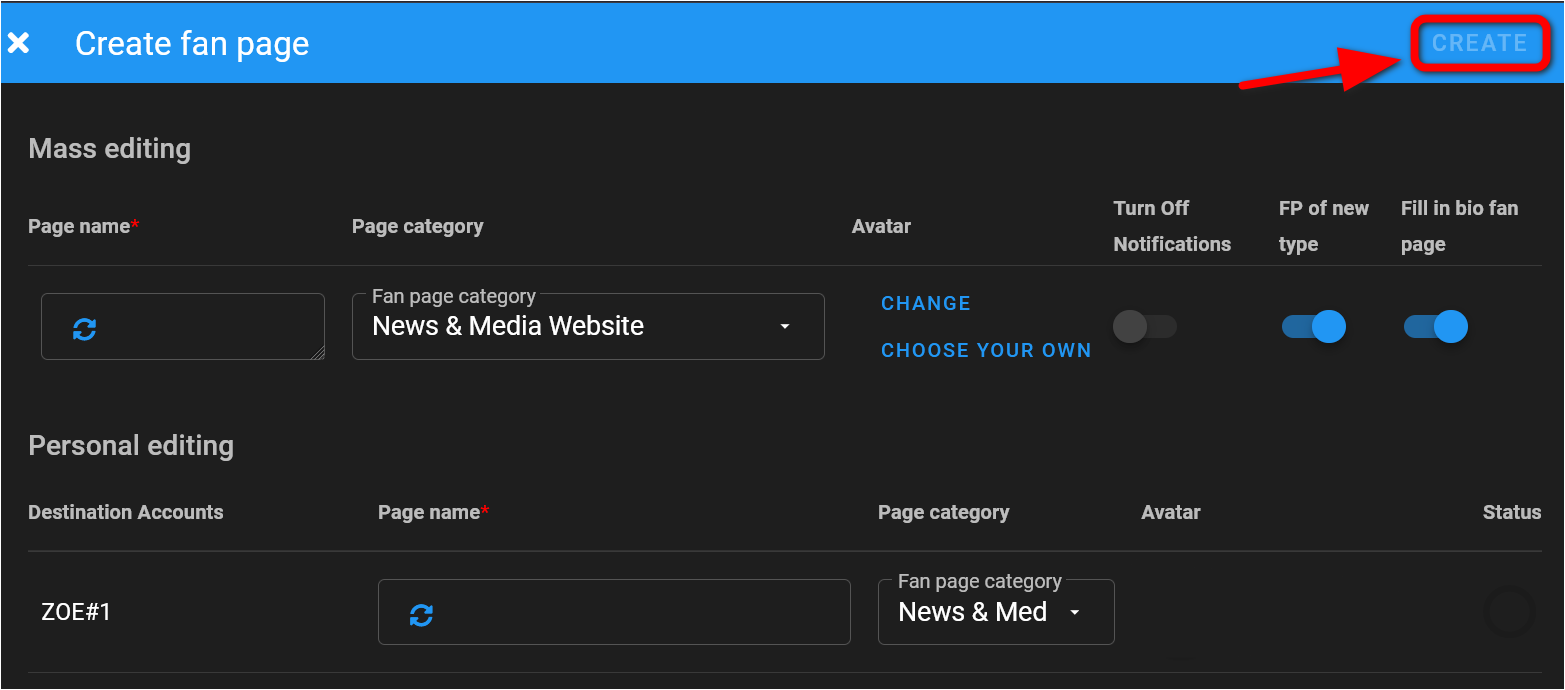
- Click Three dots → Create Fan Page.
- In the window that opens, set the Fan Page parameters and click Create.
The Fan Page will be created automatically and linked to the corresponding ad account.
Logging in to Business Manager via Link
If needed, you can open Business Manager using an invite link directly from the Dolphin Cloud interface.
To do this:
- Select the required accounts.
- Paste a unique Business Manager invite link for each account.
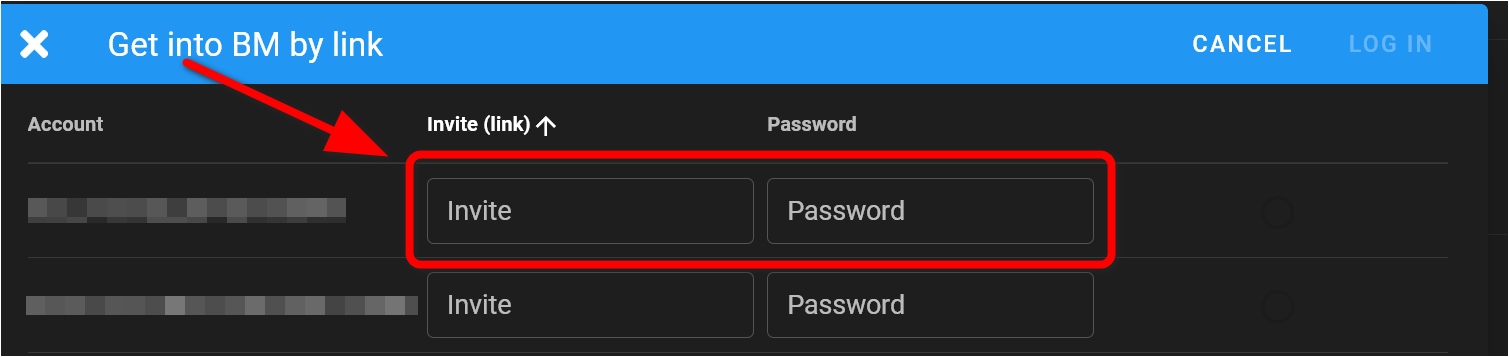
- Open the link via Dolphin Cloud.
Linking Bank Cards
After creating a Fan Page, you need to add payment details.
- Select the accounts.
- Go to the Accounts tab.
- Select the required ad accounts.
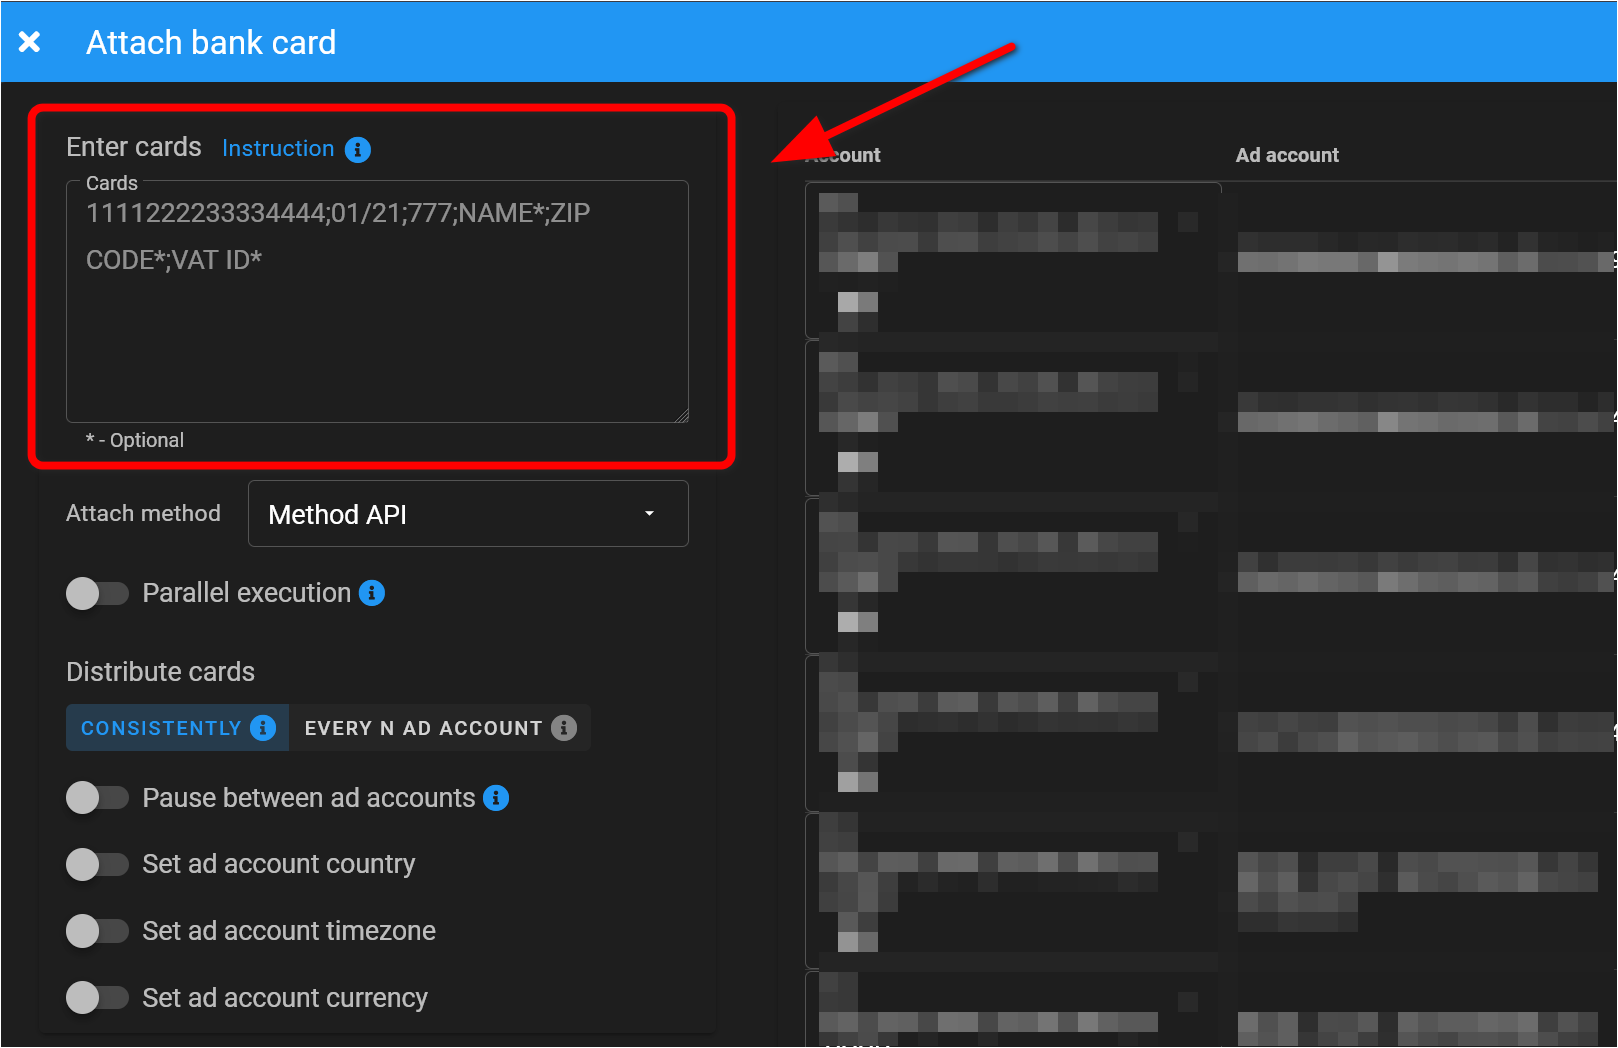
- Click Three dots → Link bank card.
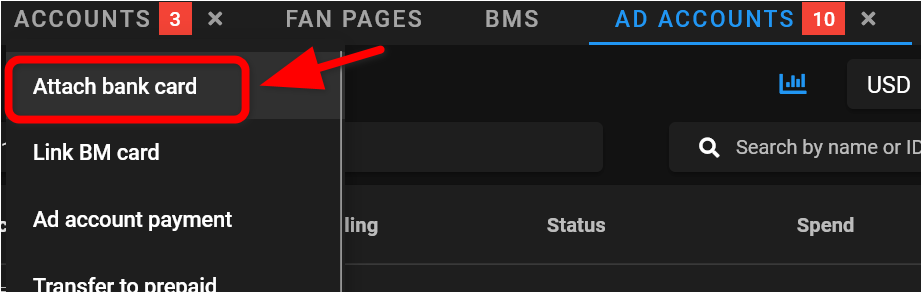
- In the window that opens, add one or more cards.
2. Creating an Ad Setup
Creating an ad setup in Dolphin Cloud consists of three consecutive steps:
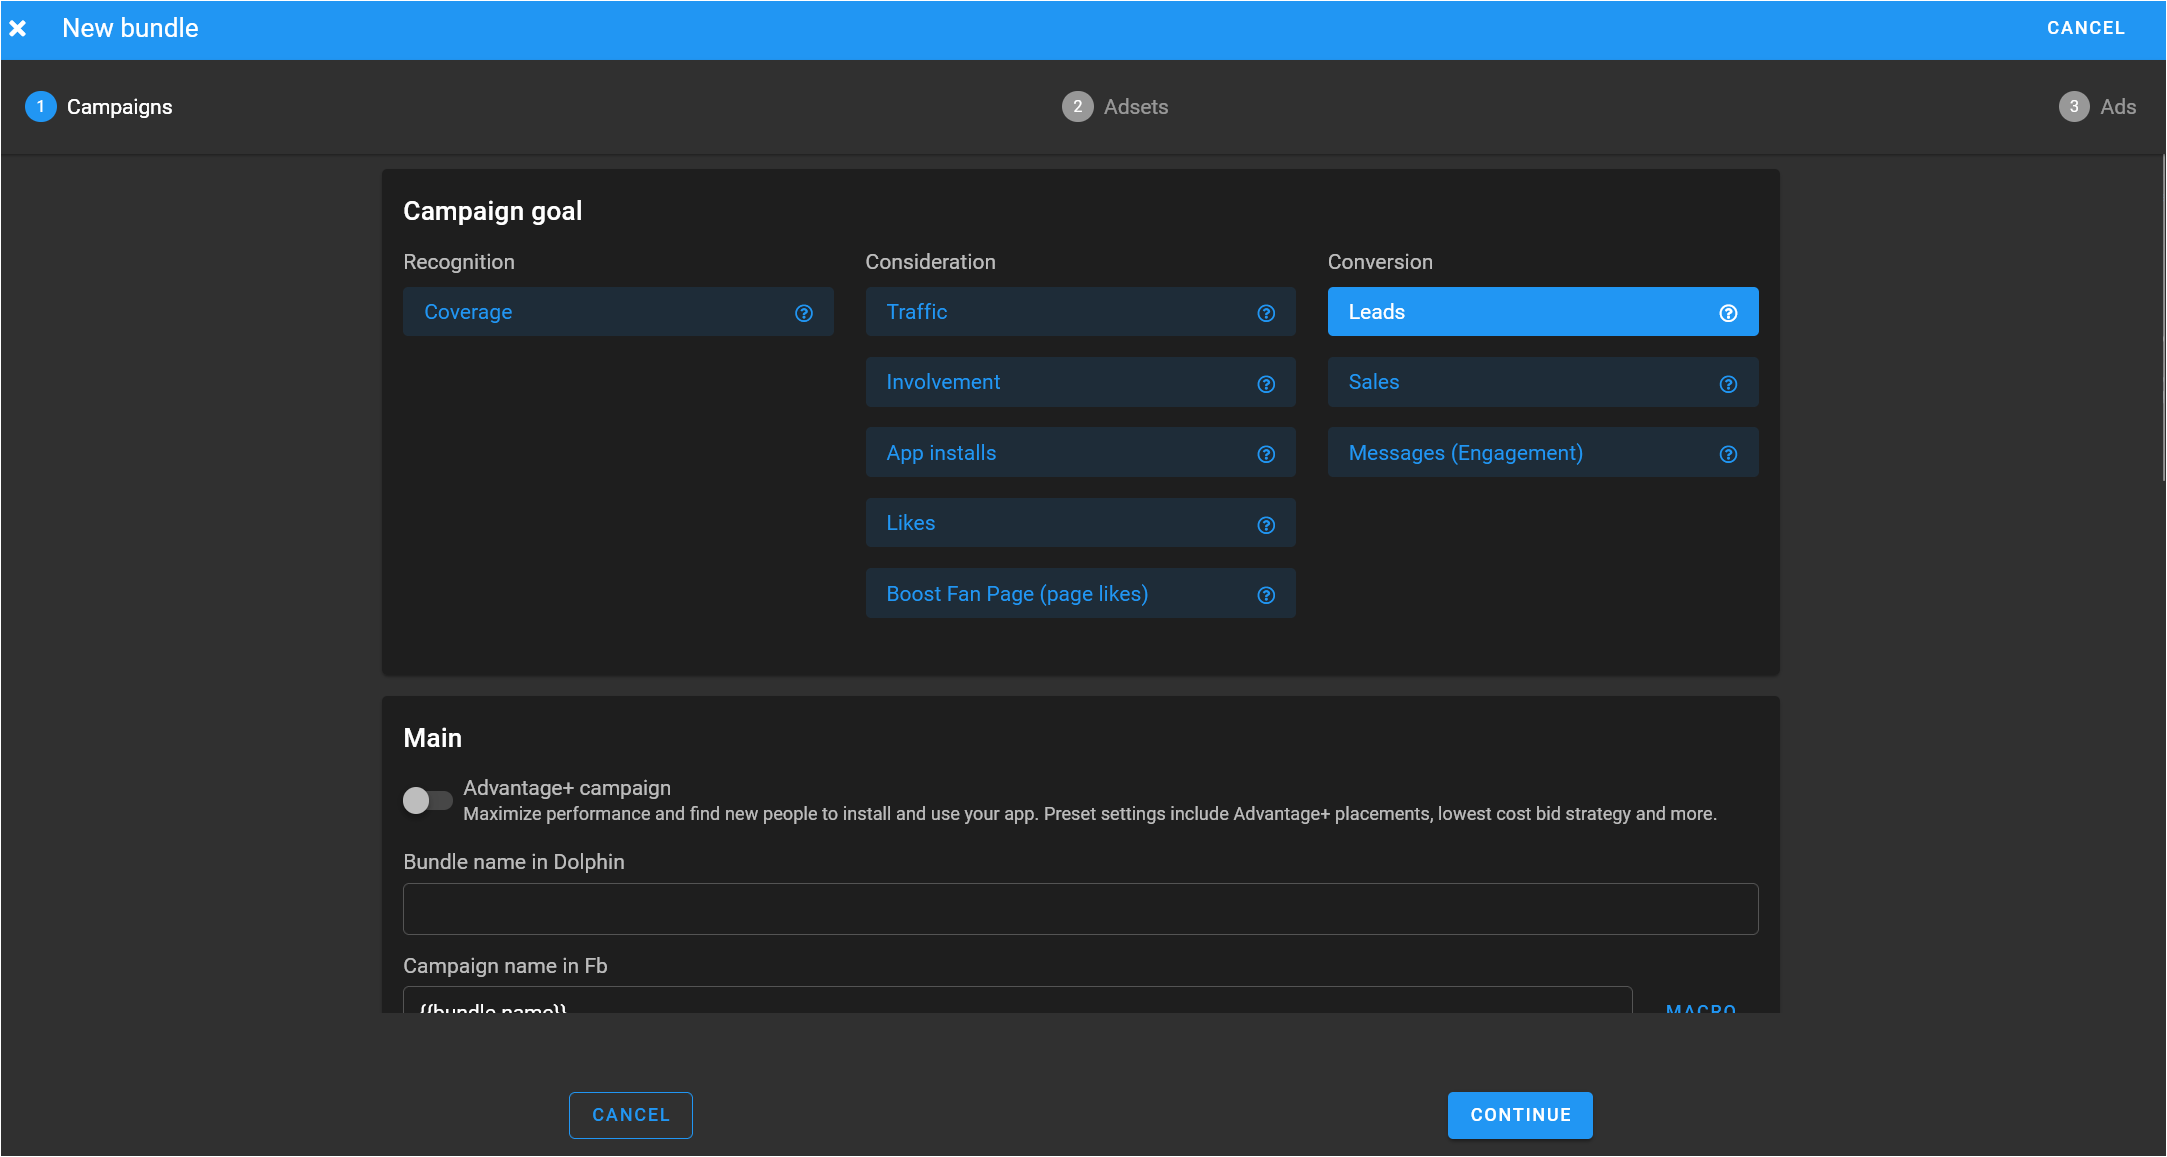
Campaign Setup
- In the left menu, select Upload ads.
- Click Create setup.
- Choose the setup objective (for example, Conversions, Traffic, App installs).
- Add campaign parameters according to your launch strategy (name, objective, basic settings).
Ad Set Setup
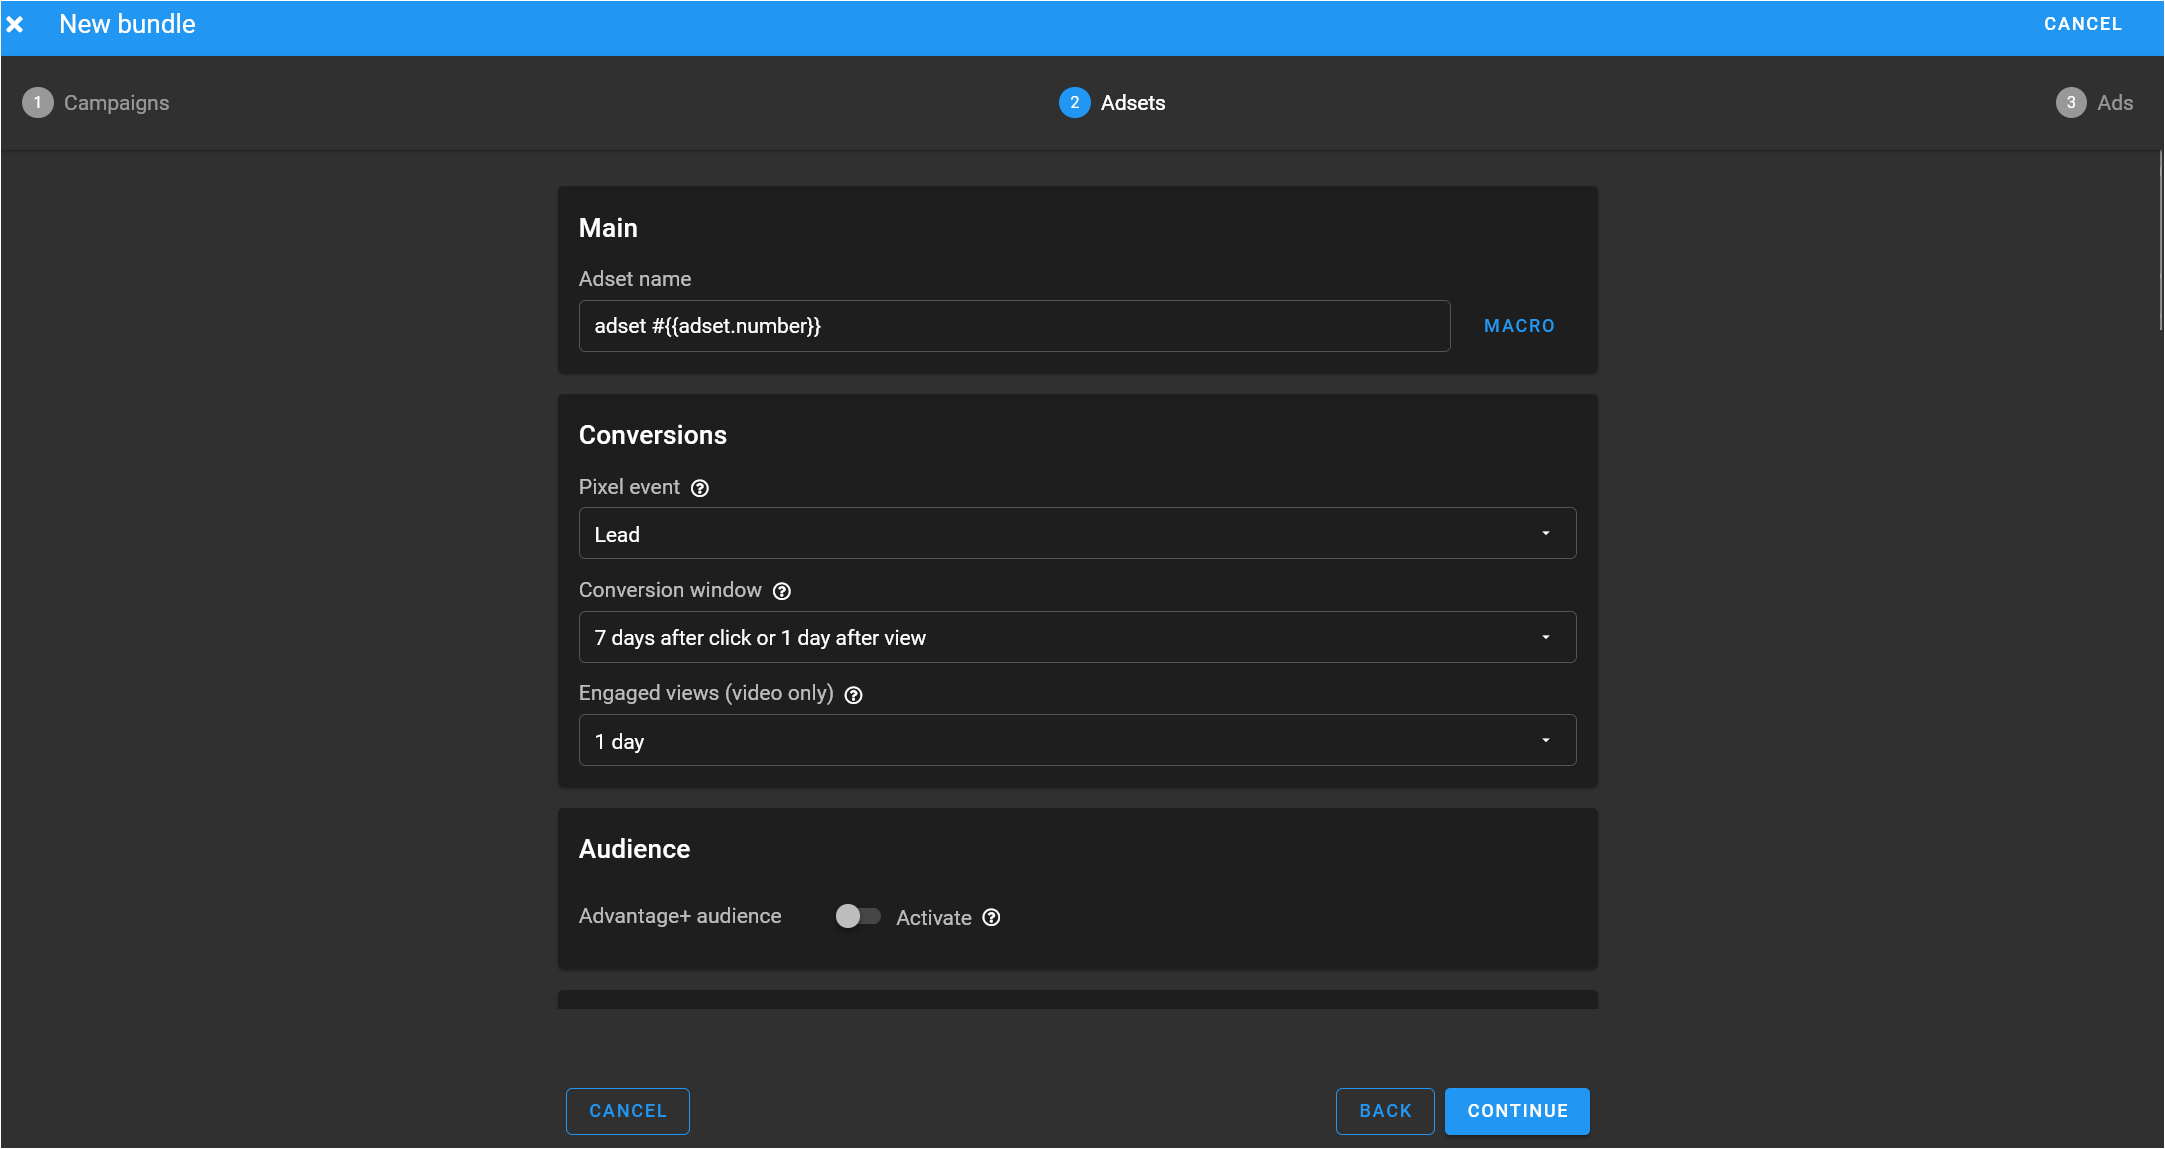
At this stage, audience and optimization settings are defined.
Depending on the campaign type, you need to set:
- Pixel event — for conversion campaigns;
- App event — for app installs;
- audience parameters (geo, age, gender, and other settings).
Ad Setup
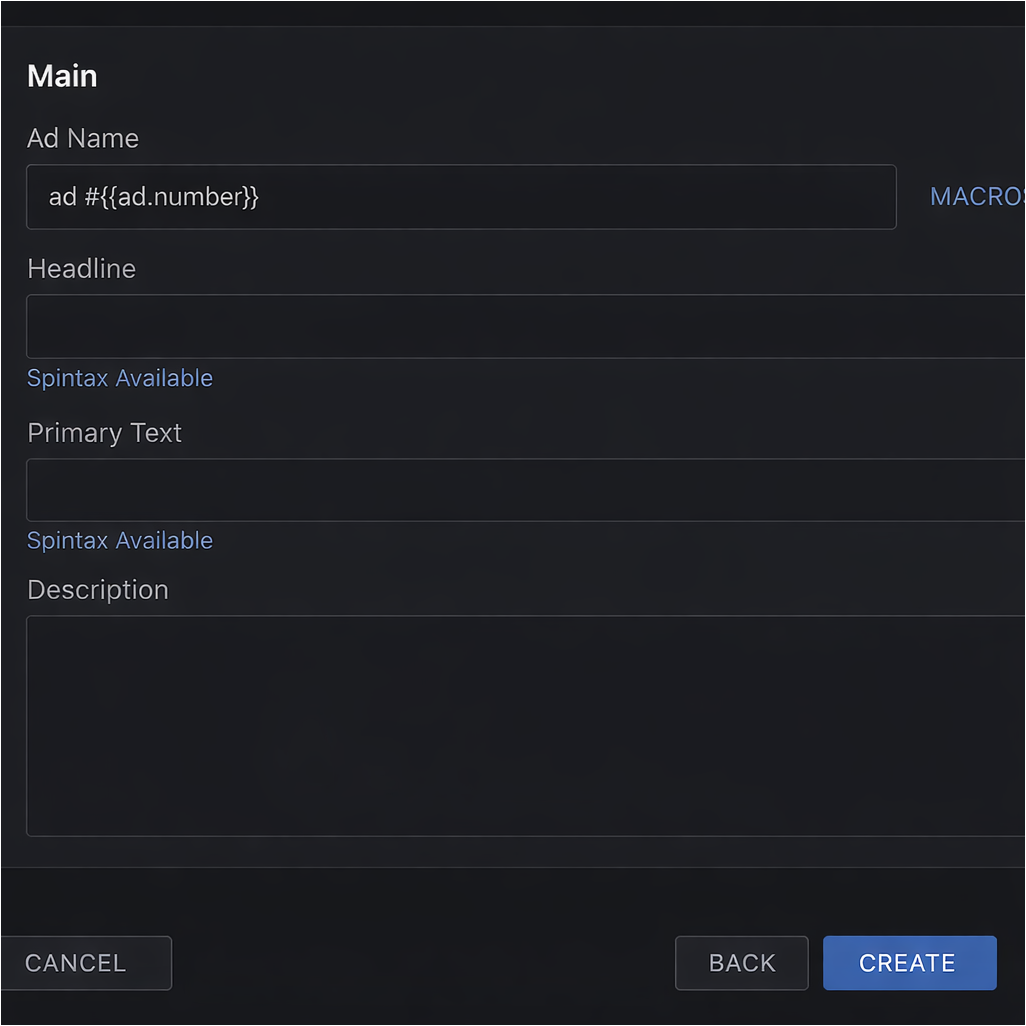
At this stage, you need to specify:
- Headline;
- Primary text;
- Description;
- Call to Action button.
3. Launch
Preparing a Link for Launching in ZM apps
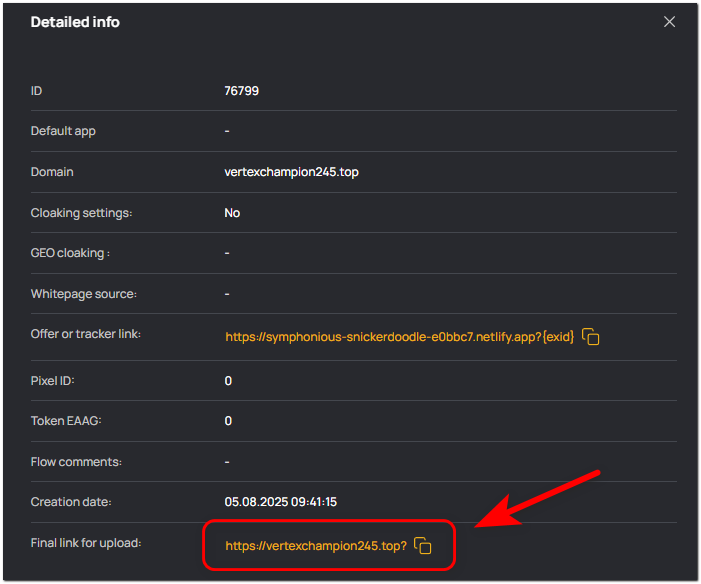
The launch link is the final ZM apps link that traffic will be sent to after campaigns go live. To get the link:
- Create a flow in your ZM apps dashboard.
We’ve prepared a detailed step-by-step guide on how to set everything up for:
- Copy the final launch link.
Setting Up the Launch Parameters in Dolphin Cloud
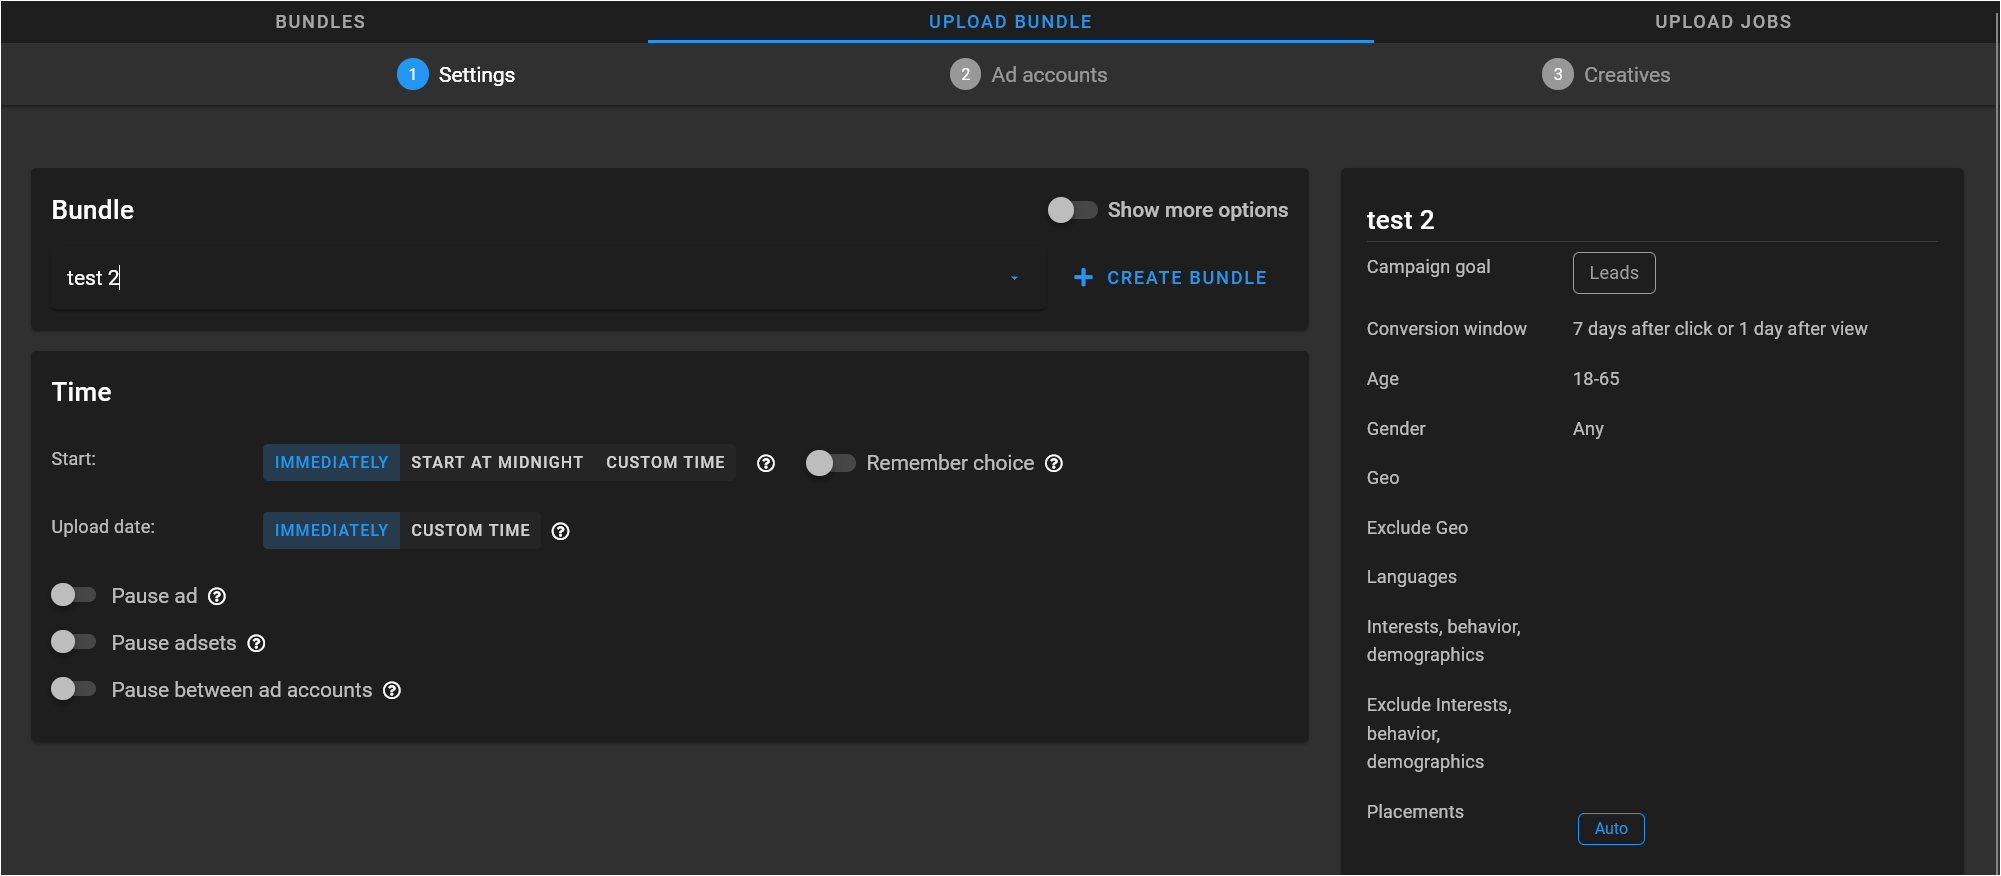
- Select the setup you created earlier.
- In the top menu, click Launch setup.
- Set the budget, bidding strategy, and launch parameters.
- Go to the Accounts section.
- Select the ad accounts where the launch will run.
- For each account, specify:
- Fan Page;
- Pixel (if used);
- budget;
- ZM apps link.
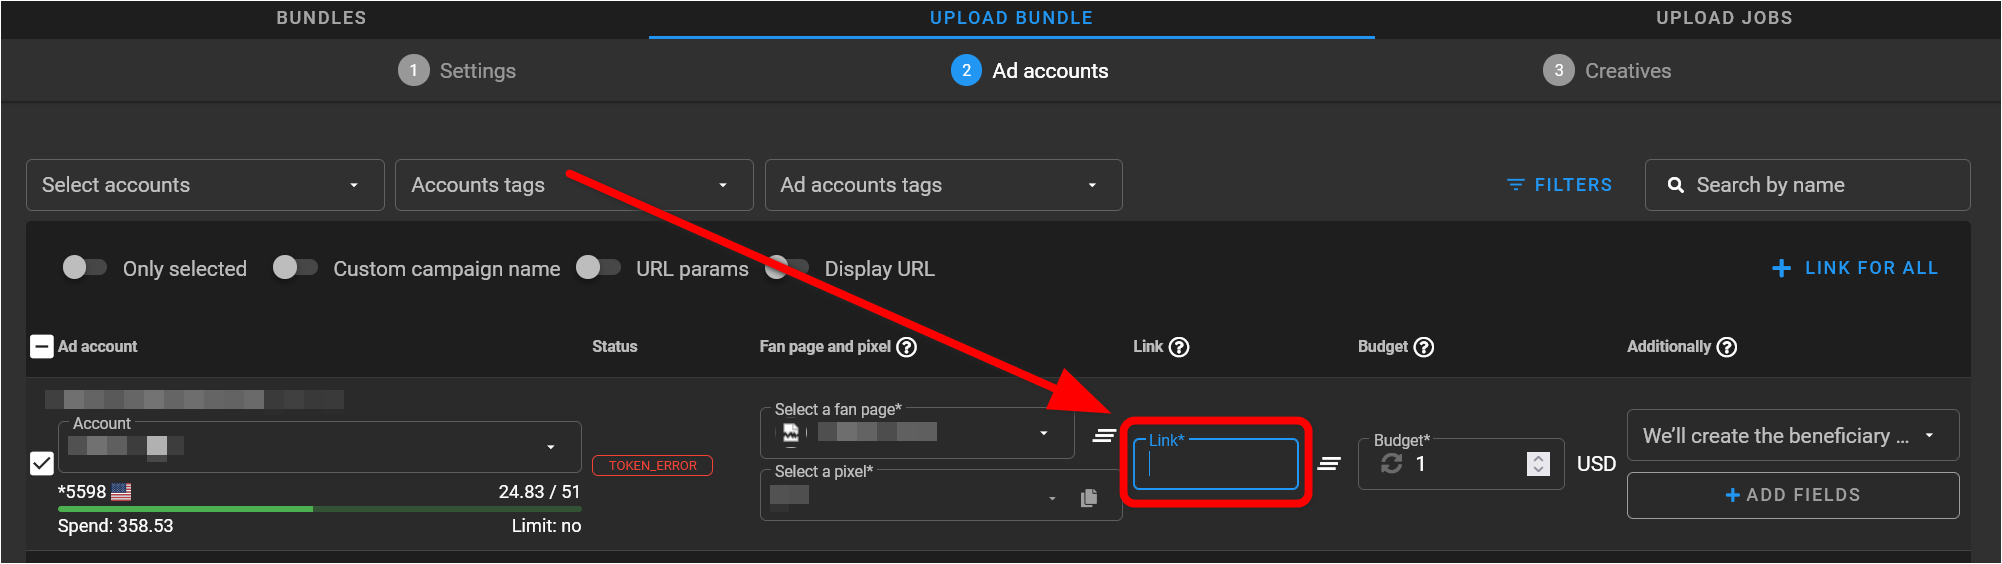
After finishing the setup and adding the final link, prepare your creatives and add them to the setup.
At this point, preparation is complete — you can start the launch.
For stable system performance, regularly check token statuses and make sure cookies are up to date.