How to Set Up Integration with Unity Ads
This guide walks you through the step-by-step process of setting up in-app integration with Unity Ads.
Part 1: Get the Naming
- Go to the Naming section in the ZM apps menu.
- Add a tracker link and click Create Naming.
- Creating a naming takes just a few seconds – the system will automatically link the tracker to your account and generate the required format.
Part 2: Setting Up Unity Ads
1. Add Your App to Unity Ads
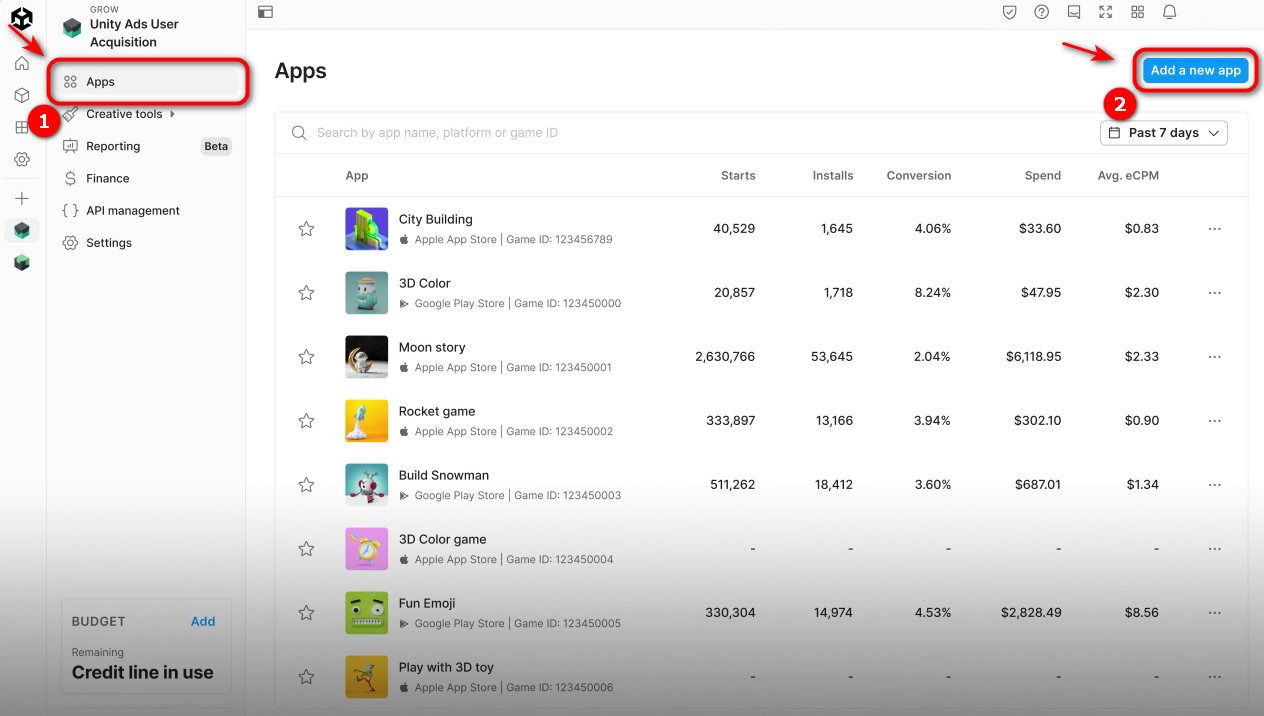
- Go to Unity Dashboard → Unity Ads User Acquisition → Add a new app.
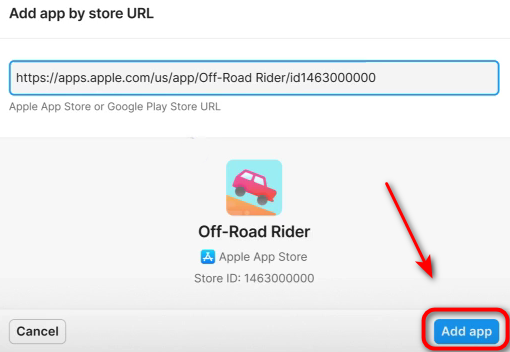
- Enter your app’s store URL and click Add app.
important
When copying an app link from the store, you must include the full URL, including all parameters at the end ("the tail").
For example:
https://apps.apple.com/app/id1234567890?platform=iphone&ppid=abcd1234
If you copy only id1234567890, the app will not be recognized.
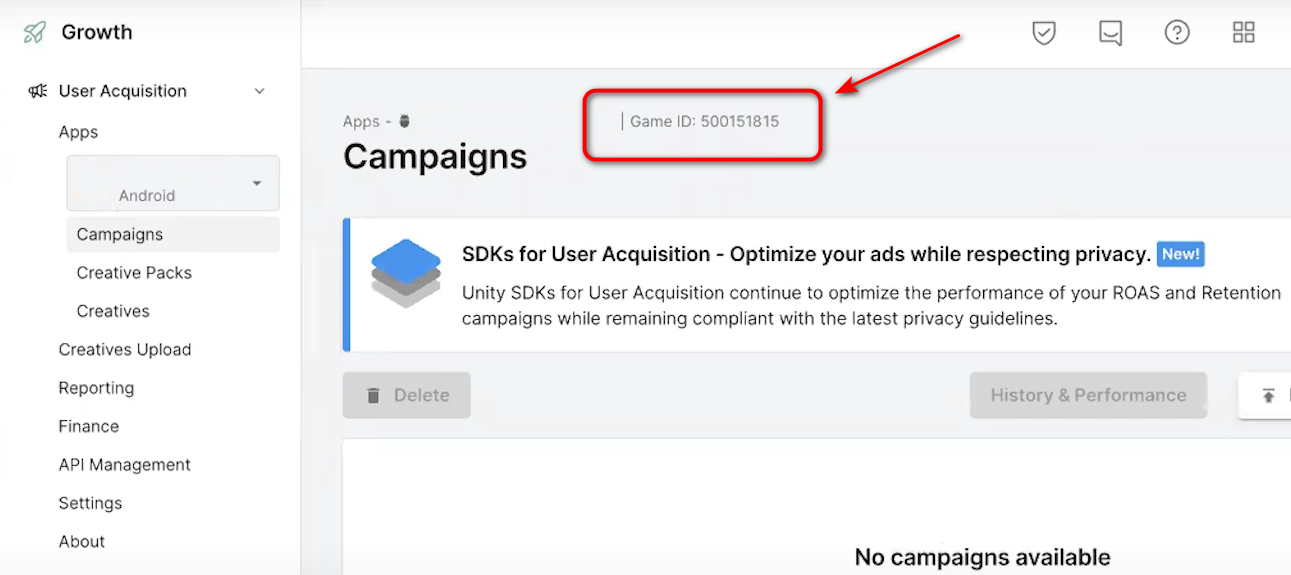
- Open the app card and find the Unity Ads Game ID. Copy it for later use.
2. Send Data to ZM apps Support
Send us:
- The naming in the format
rent://... - The app with its store link
- The name of the integrated service – Unity Ads
- The Unity Ads Game ID
You will receive two links – Click and Impression – which need to be added to Unity Ads.
3. Create a Campaign
- Go to Unity Dashboard → Unity Ads User Acquisition and select the desired app.
- Click Create Campaign.
- In the campaign name, enter the naming generated in ZM apps.
- Insert the links received from ZM apps support:
- Click URL (for clicks)
- Start (impression) URL (for impressions)
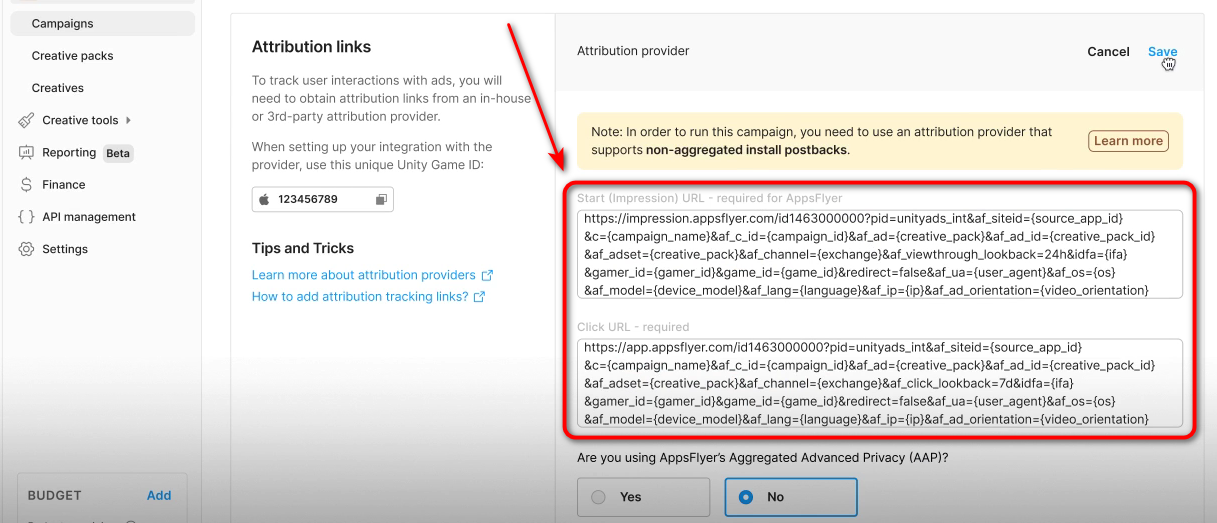
Done! Your integration is complete.
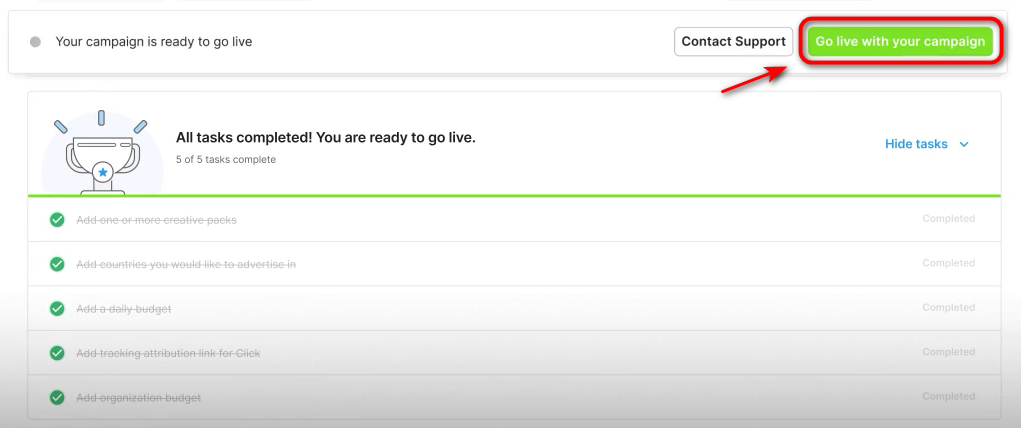
Adjust other settings as needed and click Go live with your campaign to launch.